Creating tickets is the second stage of event creation. Ensure you have completed entering your event details before proceeding to add tickets.
To Learn How to Create a Venue Event, Click Here.
To Learn How to Create an Online Event, Click Here.
Now, let’s walk you through the process of adding tickets:
How to Add Tickets to Your Event
Start Adding Tickets:
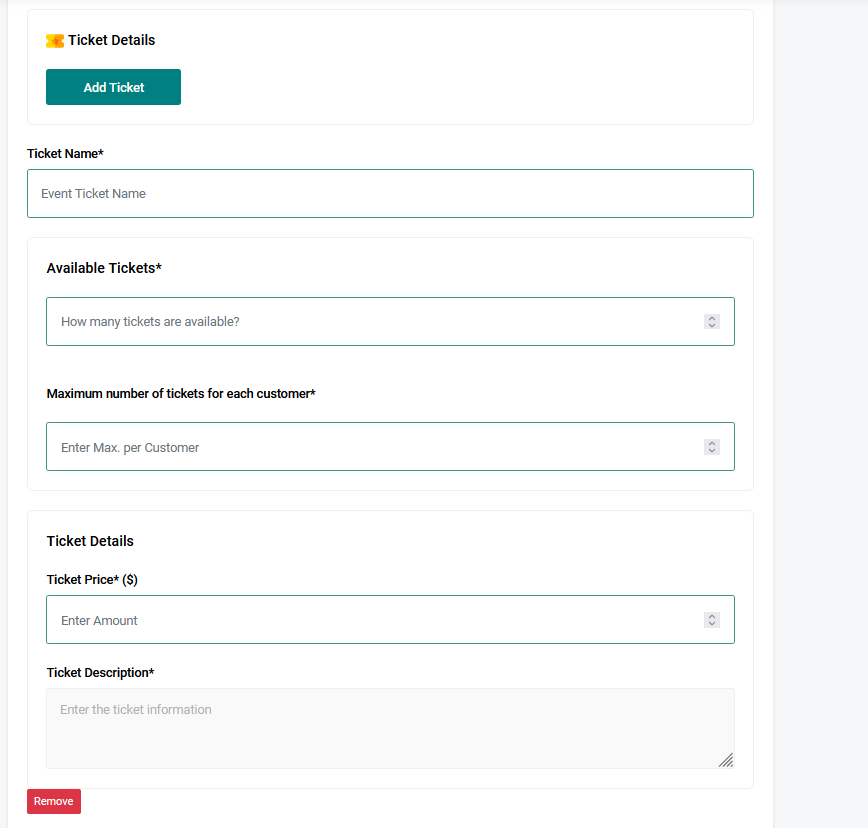
Click on the "Add Ticket" button.
Add Multiple Tickets:
If you are creating more than one ticket type, you will need to add each ticket separately with its specific details.
Enter Ticket Details:
Ticket Name: Enter the name of the ticket (e.g., Regular, VIP, Gold, Standard).
Number of Tickets Available: Specify the number of tickets available for this type. For example, if you are selling 100 Regular tickets, input 100 in the available tickets field.
Maximum Tickets Per Customer: Set the maximum number of tickets a customer can order. For example, if you don’t want one person to order more than one ticket, input 1 in the maximum number field.
Ticket Price: Enter the price of the ticket.
Ticket Description: Add specific details about the ticket (e.g., "This Gold ticket includes one bottle of Hennessy and Shisha").
Add More Tickets:
Once you have filled in the details for one ticket, click "Add Ticket" again to add another. A new ticket details form will appear below the one you just completed. Repeat the process for each ticket type you want to add.
Finalize Your Event:
If you are satisfied with your tickets and event details, click "Create Event" to finalize the process.
If you need to make adjustments, click the "Previous" button to go back and edit your information.
View and Share Your Event:
After clicking "Create Event," you will be taken to a page where you can view your event page and share it with others for bookings.
By following these steps, you can efficiently add and manage tickets for your event, ensuring a smooth and organized ticketing process.